GitHub アクションの設定
読む時間の目安: 6 分
本ページでは Docker において CI/CD と連携させるための GitHub アクションの設定手順を示します。 新たな連携を設定するにあたっては、CI/CD のベストプラクティスとして Ben のブログ を一読してください。
ここに説明する手順は以下のものです。
- GitHub アクションを設定する Docker プロジェクトを例として用います。
- GitHub アクションのワークフローを設定します。
- ワークフローの最適化を行って、ビルド時間を軽減します。
- 特定バージョンのみを Docker Hub にプッシュします。
Docker プロジェクトの設定
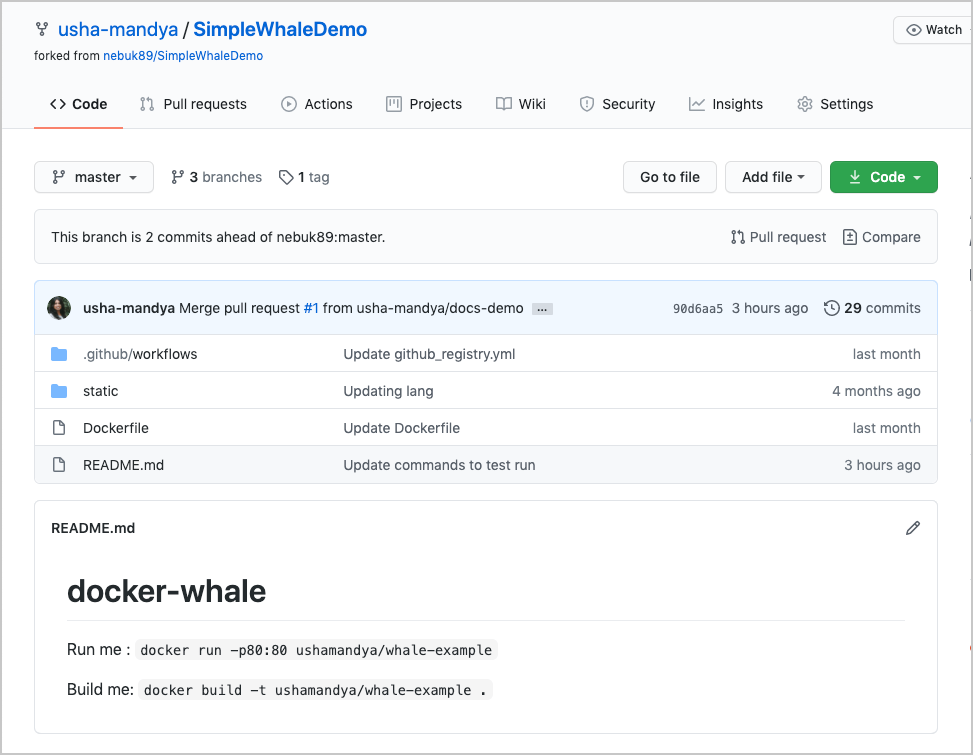
ここからはじめていきます。 本ガイドでは、例となる簡単な Docker プロジェクトを利用します。 リポジトリ SimpleWhaleDemo に Nginx alpine イメージがあります。 このリポジトリをクローンして利用するか、あるいは独自の Docker プロジェクトを用意して利用してください。
はじめるにあたっては、生成するどのワークフローからも Docker Hub にアクセスできることが必要です。 これを実現するには以下を行います。
-
Docker ID を GitHub の secret 情報として追加します。 GitHub リポジトリにアクセスして Settings > Secrets > New secret をクリックします。
-
新たな secret を生成します。 名前を
DOCKER_HUB_USERNAMEとし、その値を Docker ID とします。 -
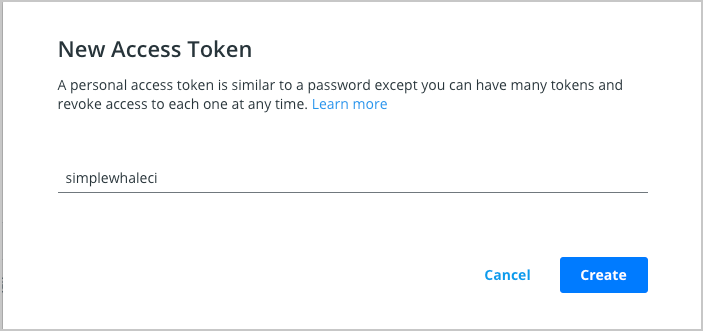
新規に個人用アクセストークン(Personal Access Token; PAT)を生成します。 新規トークンの生成は Docker Hub Settings にアクセスして New Access Token をクリックします。
-
このトークンを simplewhaleci (simple whale ci; 単純なクジラの CI) と命名することにします。
-
そしてこの個人用アクセストークン(PAT)を GitHub の 2 つめの secret として追加します。 名前を
DOCKER_HUB_ACCESS_TOKENとします。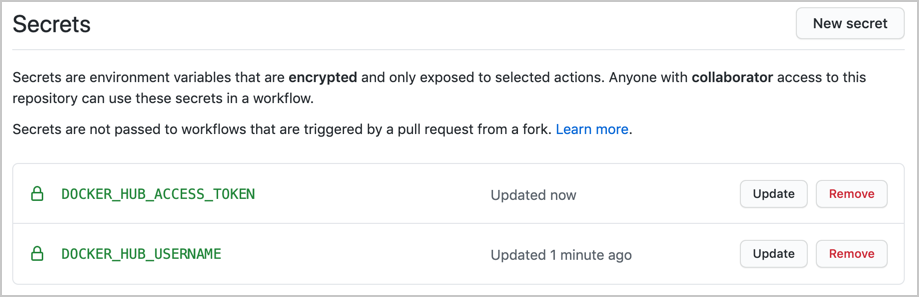
GitHub アクションワークフローの設定
前節において PAT を生成し GitHub に追加しました。 これによってどのワークフローからでも Docker Hub にアクセスできるようになりました。 そこで GitHub アクションワークフローを設定して、GitHub 上のイメージのビルドと保存を行ってみます。
この例においては push フラグをtrueに設定し、プッシュができるようにします。
さらにタグを 1 つ追加して、常に最新版にアクセスするようにします。
そして最後にイメージダイジェストを echo して、何がプッシュされたかを確認します。
ワークフローの設定は以下のように行います。
- GitHub 上のリポジトリにアクセスします。 そして Actions > New workflow をクリックします。
- set up a workflow yourself をクリックし、以下に示す内容を追加します。
まずはワークフローに名前をつけます。
name: ci
そしてこのワークフローをいつ実行するかを決めます。 この例では、プロジェクトの main ブランチへのプッシュが行われるたびに実行されるものとします。
on:
  push:
    branches:
      - 'main'
次にこのワークフロー内において、どのようなことを行いたいか(どんなジョブ(jobs)とするか)を指定します。 ここではビルド処理を指定し、入手可能な最新の Ubuntu インスタンス上で実行するようにします。
jobs:
  build:
    runs-on: ubuntu-latest
そして必要となる手順を追加します。
- まず
$GITHUB_WORKSPACEにあるリポジトリをチェックアウトして、ワークフローからアクセスできるようにします。 - 2 つめとして、PAT とユーザー名を使って Docker Hub にログインします。
- 3 つめはビルダーです。 このアクションは Docker Buildx を設定するものであり、BuildKit コンテナーを内部で利用するビルダーインスタンスを生成します。
    steps:
      -
        name: Checkout
        uses: actions/checkout@v2
      -
        name: Login to Docker Hub
        uses: docker/login-action@v1
        with:
          username: ${{ secrets.DOCKER_HUB_USERNAME }}
          password: ${{ secrets.DOCKER_HUB_ACCESS_TOKEN }}
      -
        name: Set up Docker Buildx
        uses: docker/setup-buildx-action@v1
      -
        name: Build and push
        uses: docker/build-push-action@v2
        with:
          context: .
          file: ./Dockerfile
          push: true
          tags: ${{ secrets.DOCKER_HUB_USERNAME }}/simplewhale:latest
ではとりあえずワークフローを動かしてみましょう。 その後に Dockerfile を調整していきます。 CI が実行され、イメージに対する新たな変更がプッシュされるようにします。

ワークフローの最適化
ここからは、レジストリを利用したビルドキャッシュを通じて、GitHub アクションワークフローを最適化する方法について見ていきます。 Dockerfile やソースコードの中で、変更が発生していない命令は実行する必要がなくなるため、ビルド時間の削減につながります。 また Docker Hub に対して実施するプル総数も減らすことができます。
この例では、ビルドおよびプッシュの手順に向けて、さらなる属性追加が必要になります。
      -
        name: Login to Docker Hub
        uses: docker/login-action@v1
        with:
          username: ${{ secrets.DOCKER_HUB_USERNAME }}
          password: ${{ secrets.DOCKER_HUB_ACCESS_TOKEN }}
      -
        name: Build and push
        uses: docker/build-push-action@v2
        with:
          context: ./
          file: ./Dockerfile
          builder: ${{ steps.buildx.outputs.name }}
          push: true
          tags: ${{ secrets.DOCKER_HUB_USERNAME }}/simplewhale:latest
          cache-from: type=registry,ref=${{ secrets.DOCKER_HUB_USERNAME }}/simplewhale:buildcache
          cache-to: type=registry,ref=${{ secrets.DOCKER_HUB_USERNAME }}/simplewhale:buildcache,mode=max
As you can see, we are using the type=registry cache exporter to import/export
cache from a cache manifest or (special) image configuration. Here it will be
pushed as a specific tag named buildcache for our image build.
Now, run the workflow again and verify that it uses the build cache.
Push tagged versions and handle pull requests
Earlier, we learnt how to set up a GitHub Actions workflow to a Docker project, how to optimize the workflow by setting up cache. Let’s now look at how we can improve it further. We can do this by adding the ability to have tagged versions behave differently to all commits to master. This means, only specific versions are pushed, instead of every commit updating the latest version on Docker Hub.
You can consider this approach to have your commits pushed as an edge tag to then use it in nightly tests. By doing this, you can always test the last changes of your active branch while reserving your tagged versions for release to Docker Hub.
First, let us modify our existing GitHub workflow to take into account pushed tags and pull requests:
on:
  push:
    branches:
      - 'main'
    tags:
      - 'v*'
This ensures that the CI will trigger your workflow on push events
(branch and tags). If we tag our commit with something like v1.0.2:
$ git tag -a v1.0.2
$ git push origin v1.0.2
Now, go to GitHub and check your Actions

Let’s reuse our current workflow to also handle pull requests for testing purpose but also push our image in the GitHub Container Registry.
First we have to handle pull request events:
on:
  push:
    branches:
      - 'main'
    tags:
      - 'v*'
  pull_request:
    branches:
      - 'main'
To authenticate against the GitHub Container Registry,
use the GITHUB_TOKEN
for the best security and experience.
Now let’s change the Docker Hub login with the GitHub Container Registry one:
        if: github.event_name != 'pull_request'
        uses: docker/login-action@v1
        with:
          registry: ghcr.io
          username: ${{ github.actor }}
          password: ${{ secrets.GITHUB_TOKEN }}
Remember to change how the image is tagged. The following example keeps ‘latest’ as the only tag. However, you can add any logic to this if you prefer:
tags: ghcr.io/<username>/simplewhale:latest
Note: Replace
<username>with the repository owner. We could use${{ github.repository_owner }}but this value can be mixed-case, so it could fail as repository name must be lowercase.

Now, we will have two different flows: one for our changes to master, and one for our pushed tags. Next, we need to modify what we had before to ensure we are pushing our PRs to the GitHub registry rather than to Docker Hub.
まとめ
In this guide, you have learnt how to set up GitHub Actions workflow to an existing Docker project, optimize your workflow to improve build times and reduce the number of pull requests, and finally, we learnt how to push only specific versions to Docker Hub.
次のステップ
You can now consider setting up nightly builds, test your image before pushing it, setting up secrets, share images between jobs or automatically handle tags and OCI Image Format Specification labels generation.
To look at how you can do one of these, or to get a full example on how to set up what we have accomplished today, check out our advanced examples which runs you through this and more details.
CI/CD, GitHub Actions